Rubber stamping allows you to make professional-looking greeting cards very easily, quickly and with no artistic talent. It is a relaxing creative outlet.
Stamps MUST be cleaned after each use and before changing ink colors. Stamp cleaning solutions are sold in stores, but are unnecessary with most inks. All that is needed is water. A wet and dry paper towel, a fuzzy paint pad wet with water and a towel, or baby wipes (without alcohol or oils) all work well. Lint and glitter can be easily removed from stamps with tape.
Stamping a bold image with a colored ink pad is the fastest way to stamp. Just tap the stamp on the ink pad until it has an even layer of ink and then stamp, applying even pressure to the whole stamp. Do NOT rock the stamp. Carefully lift the stamp from the paper with one hand while holding the paper with the other hand. Use several colored ink pads to add more colors to the card, cleaning the stamp between each color.
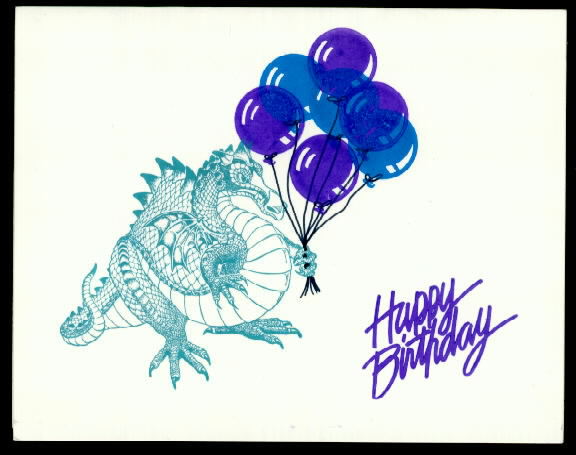
(Sample is on white glossy paper; PSX dragon, Rubber Stampede "Happy Birthday" and Stampendous balloon inked with stamp pads; balloon strings drawn with a black pen.)
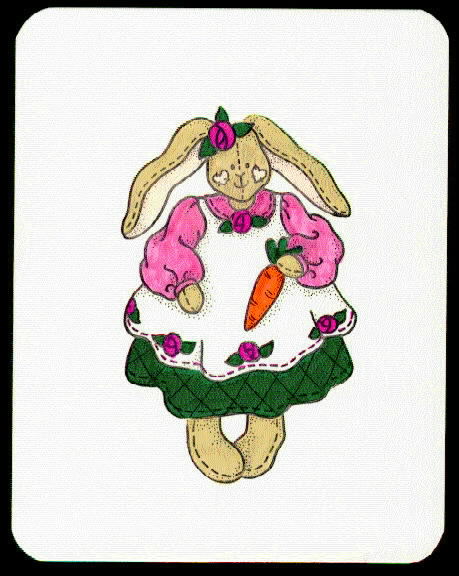
You can stamp an image using black ink and then color the image with markers for a colorful, more detailed card. (Remember how relaxing coloring is!) A "watercolor" ink pad is recommended for this because they are made not to bleed. First, ink the stamp with a black ink pad, then stamp. Next, color with markers.
(Sample is on white glossy paper; Rubber Stampede "Betsy Bunny" stamped in black ink; colored with Marvy Le Plume II markers; corners rounded with Fiscars "Cloud" scissors)
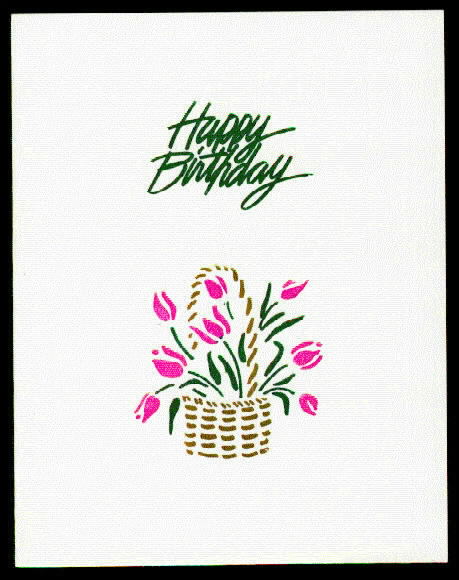
To stamp an image with different colors at the same time, or instead of buying many different colored ink pads, use rubber stamping markers to color the stamp. Turn the stamp over so that the rubber die is facing up. Using the side of the marker instead of the tip, color the parts of the die. Always plan the colors that you will use and start with the lightest color first, then gradually work up to the darkest color. This will keep your markers from getting muddy.
By the time you have finished coloring the whole stamp, the first colors that you applied may have already dried, so you'll need to "huff" or exhale through your mouth over the stamp. This will re-moisten the inks. Then stamp on glossy paper.
(Sample is on white glossy paper; Printworks tulip basket and Rubber Stampede "Happy Birthday" inked with Marvy LePlume II markers)
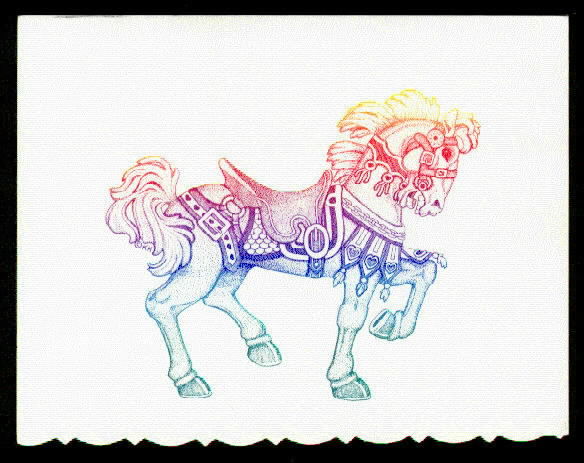
Rainbow pads are an easy way to get lots of bright colors on a card quickly. Tap the stamp up and down on the rainbow pad. Try to tap the stamp in the same relative position over the pad each time to reduce the mixing of colors on the ink pad. A large stamp may be inked on a rainbow pad by tapping the stamp on the pad a section (of the stamp) at a time until the whole stamp is inked. Then stamp on paper.
If you prefer for the colors to be slightly blended instead of distinct bars of color on your image, tap the stamp on the ink pad several times in the same area and then move slightly (about half a bar) toward the darker colors and tap several times again. Then stamp on paper. With this method, you need to be careful to always move from lighter colors toward the darker colors to avoid muddying the lighter colors on the pad.
You can also create a rainbow effect without a rainbow ink pad by using different colored markers directly on the die in a rainbow pattern. If you want the colors to be blended, blend with the lighter color as you go, but be sure to clean the marker by wiping on scrap paper afterwards. (Warning - Markers may become somewhat muddy over time with this method.)
(Sample is on white glossy paper; Mostly Animals carousel horse; Kalideacolor Calypso rainbow pad; bottom edge trimmed with Family Treasures "Antique Elegance" scissors)
Embossing is the most professional technique in rubber stamping and the one that gets most people hooked on stamping. It involves stamping an image, then sprinkling an embossing powder over the stamped image and heating to melt the powder.
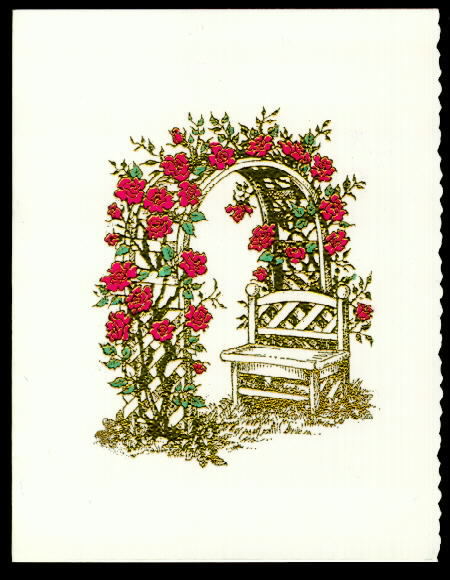
(Sample is on white glossy paper; PSX "Rose Arbor" embossed in gold embossing powder; colored with markers; right side trimmed with deckle edge scissors, available from Fiscars and Family Treasures)
You'll need the following items for embossing:
Ink the stamp with the embossing ink. This ink is made to stay wet longer than other inks, so you will have some time to apply the embossing powder. Sprinkle embossing powder over the image so that it is completely covered. Tap the paper to remove extra powder and then use a small paint brush to brush off stray specks of powder. Return the extra powder to the container. Heat the image with a head source, being careful not to over heat.
It is recommended that you color an embossed image with markers since colored pencils won't be able to get right up against the embossing.
For the techniques in which color is applied to the paper via the stamp, glossy papers are recommended. Glossy paper has a coating on it that makes it shine. This coating also makes ink sit on top instead of being absorbed into the paper. The ink will dry, but it takes a little longer than on matte paper and results in brighter colors. Markers work best for applying color directly to glossy paper.
Matte paper is not coated and is the type of paper with which people are more familiar. It is great for stamping an outline stamp and coloring in with colored pencils for a softer look. Ink dries faster on matte paper than on glossy. Markers, colored pencils or any coloring medium works well for applying color directly to matte paper.
As far as expense, they go in this order from most expensive to least expensive: wood mounted, rubber/foam mounted, unmounted.
For stamps about 4" and over, I would want them to be wood mounted as opposed to rubber/foam mounted in order to be able to apply pressure evenly to the image when stamping. However, you can buy rubber/foam mounted stamps and then mount them yourself to save some money.
The biggest problem with rubber/foam mounted stamps is that the rubber is not trimmed closely around the image. Therefore, you have to be very careful when stamping with them so that the corners of the rubber don't print. There are a couple of ways to fix this problem. After inking the stamp, you can wipe just the corners of the rubber with a paper towel to remove the ink from them. Or you could carefully cut the corners and extra rubber off of the image while it is still mounted. Anoher way to fix this is to peel the rubber die off of the mount and carefully trim around the image. (Sometimes you have to pull really hard to remove the rubber from the mount. Be careful not to damage the die. Personally, I've never had a die become damaged doing this. They are usually quite sturdy.) Then restick or glue the rubber die back on the mount or remount it on wood.
Unmounted stamps come as just the rubber die. They are not sold this way by the big name companies such as PSX, or Rubber Stampede. You have to mount unmounteds (UMs) yourself.
There are several ways to mount stamps. The most familiar is of course wood mounting. This requires a wood block, some kind of foam cushion (you can use a thin mouse pad or a shoe insole), and an adhesive such as rubber cement.
There is also a method of mounting stamps which uses a clear acrylic block and spray adhesive. In this system, you acquire a single acrylic block in each size that you need for your different sized images. The stamps can then be placed on the block using the spray adhesive and removed as needed. The advantages of this system are that the unmounted dies take less space to store and you can see through the acrylic block to place the image when stamping. (I believe that you need to add foam cushion to each rubber die.)
A variation on the acrylic block mounting is to permanently attach plastic cling sheets (like the holiday window decorations) to the rubber dies. This eliminates the need for spray adhesive. The rubber dies will then just stick to the acrylic block. You can find plastic cling sheets in craft stores.
There is another method of mounting called HALOs. It uses velcro to attach the die to whatever block you choose. The velcro also acts as a cushion.
You should be able to find web sites selling the materials necessary for mounting stamps and more information on the different methods. Also check the ads in Rubberstampmadness and other RS magazines for supply sources.